E2FGVI(Towards An End-to-End Framework for Flow-Guided Video Inpainting) によるInpainting(画像修復)の方法について紹介します。
実際に動画から人を消してみましょう。
Google colabを使用して簡単に実装することができますので、ぜひ最後までご覧ください。
今回の目標
・E2FGVI概要
・データセットの作成方法
・Inpaintingの実装
E2FGVIは
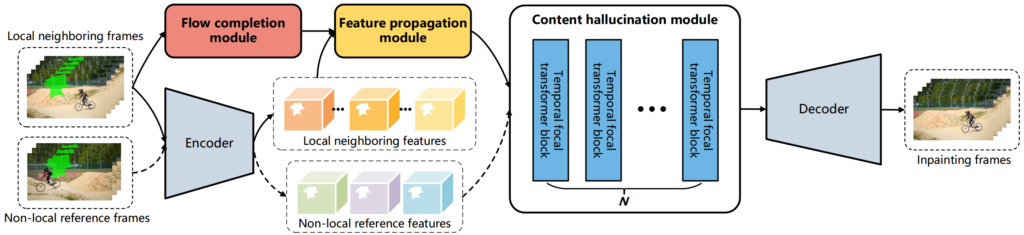
E2FGVI(Towards An End-to-End Framework for Flow-Guided Video Inpainting)は、動画修復(Video Inpating)をEnd to Endに実現するフレームワークです。
動画をフレームごとに分割した画像と修復したい領域を示したマスク画像を入力すると、修復したフレーム画像を出力します。
flow completion, feature propagation, content hallucination modulesの3つのモジュールを共同で最適化したことで、End to End(モデル一つ)でYouTube-VOS、DAVISのデータセットでSOTAを実現しています。
モデルの構成と出典は以下の通りです。
E2FGVIの導入
早速E2FGVIを使用していきましょう。
以下、Google colab環境で進めていきます。
まずはGPUを使用できるように設定をします。
「ランタイムのタイプを変更」→「ハードウェアアクセラレータ」をGPUに変更
今回紹介するコードは以下のボタンからコピーして使用していただくことも可能です。
![]()
from google.colab import drive
drive.mount('/content/drive')
%cd ./drive/MyDrive
!git clone https://github.com/MCG-NKU/E2FGVI.git
%cd E2FGVIPytorchとmcvvをインストールします。
!pip install torch==1.5.1+cu101 torchvision==0.6.1+cu101 -f https://download.pytorch.org/whl/torch_stable.html
!pip install mmcv-full -f https://download.openmmlab.com/mmcv/dist/cu101/torch1.5/index.html
学習済みモデルをダウンロードしましょう。
!gdown 'https://drive.google.com/uc?id=1tNJMTJ2gmWdIXJoHVi5-H504uImUiJW9'
!unzip E2FGVI_CVPR22_models.zip
以上で準備が完了しました。
サンプルデータでE2FGVIを実装
導入
まずはサンプルデータを使用して、実装してみます。
必要なライブラリをインポートします。
import matplotlib.pyplot as plt
from matplotlib import animation
import cv2
from PIL import Image
import numpy as np
import importlib
import os
import argparse
from tqdm import tqdm
import torch
from core.utils import to_tensors
必要な関数を定義します。
# global variables
w, h = 432, 240
ref_length = 10  # ref_step
num_ref = -1
neighbor_stride = 5


# sample reference frames from the whole video
def get_ref_index(f, neighbor_ids, length):
    ref_index = []
    if num_ref == -1:
        for i in range(0, length, ref_length):
            if i not in neighbor_ids:
                ref_index.append(i)
    else:
        start_idx = max(0, f - ref_length * (num_ref//2))
        end_idx = min(length, f + ref_length * (num_ref//2))
        for i in range(start_idx, end_idx+1, ref_length):
            if i not in neighbor_ids:
                if len(ref_index) > num_ref:
                    break
                ref_index.append(i)
    return ref_index


# read frame-wise masks
def read_mask(mpath):
    masks = []
    mnames = os.listdir(mpath)
    mnames.sort()
    for mp in mnames:
        m = Image.open(os.path.join(mpath, mp))
        m = m.resize((w, h), Image.NEAREST)
        m = np.array(m.convert('L'))
        m = np.array(m > 0).astype(np.uint8)
        m = cv2.dilate(m, cv2.getStructuringElement(
            cv2.MORPH_CROSS, (3, 3)), iterations=4)
        masks.append(Image.fromarray(m*255))
    return masks


#  read frames from video
def read_frame_from_videos(video_path):
    vname = video_path
    frames = []
    lst = os.listdir(vname)
    lst.sort()
    fr_lst = [vname+'/'+name for name in lst]
    for fr in fr_lst:
        image = cv2.imread(fr)
        image = Image.fromarray(cv2.cvtColor(image, cv2.COLOR_BGR2RGB))
        frames.append(image.resize((w, h)))
    return frames
モデルを読み込みます。
# set up models
device = torch.device("cuda" if torch.cuda.is_available() else "cpu")
net = importlib.import_module('model.e2fgvi')
model = net.InpaintGenerator().to(device)
ckpt_path = 'E2FGVI-CVPR22.pth'
data = torch.load(ckpt_path, map_location=device)
model.load_state_dict(data)
print(f'Loading model from: {ckpt_path}')
model.eval()
最後に、入力データを設定します。
ここではテニスの動画とマスク画像を指定しています。
# prepare dataset
video_path = 'examples/tennis'
mask_path = 'examples/tennis_mask'
print(f'Loading videos and masks from: {video_path}')
frames = read_frame_from_videos(video_path)
video_length = len(frames)
imgs = to_tensors()(frames).unsqueeze(0) * 2 - 1
frames = [np.array(f).astype(np.uint8) for f in frames]

masks = read_mask(mask_path)
binary_masks = [np.expand_dims((np.array(m) != 0).astype(np.uint8), 2)
                for m in masks]
masks = to_tensors()(masks).unsqueeze(0)
imgs, masks = imgs.to(device), masks.to(device)
comp_frames = [None] * video_length
E2FGVIを実行
いよいよ画像修復の実装です。
# completing holes by e2fgvi
print(f'Start test...')
for f in tqdm(range(0, video_length, neighbor_stride)):
    neighbor_ids = [i for i in range(max(0, f-neighbor_stride), min(video_length, f+neighbor_stride+1))]
    ref_ids = get_ref_index(f, neighbor_ids, video_length)
    selected_imgs = imgs[:1, neighbor_ids+ref_ids, :, :, :]
    selected_masks = masks[:1, neighbor_ids+ref_ids, :, :, :]
    with torch.no_grad():
        masked_imgs = selected_imgs*(1-selected_masks)
        pred_img, _ = model(masked_imgs, len(neighbor_ids))

        pred_img = (pred_img + 1) / 2
        pred_img = pred_img.cpu().permute(0, 2, 3, 1).numpy() * 255
        for i in range(len(neighbor_ids)):
            idx = neighbor_ids[i]
            img = np.array(pred_img[i]).astype(
                np.uint8)*binary_masks[idx] + frames[idx] * (1-binary_masks[idx])
            if comp_frames[idx] is None:
                comp_frames[idx] = img
            else:
                comp_frames[idx] = comp_frames[idx].astype(
                    np.float32)*0.5 + img.astype(np.float32)*0.5
結果を表示させてみましょう。
fig = plt.figure()
ax1 = fig.add_subplot(1,2,1)
ax1.axis('off'); ax1.set_title('Original Video')
ax2 = fig.add_subplot(1,2,2)
ax2.axis('off'); ax2.set_title('Our Result')
imdata1 = ax1.imshow(frames[0])
imdata2 = ax2.imshow(comp_frames[0].astype(np.uint8))
def update(idx):
imdata1.set_data(frames[idx])
imdata2.set_data(comp_frames[idx].astype(np.uint8))
fig.tight_layout()
anim = animation.FuncAnimation(fig, update, frames=len(frames), interval=50)
from IPython.display import HTML
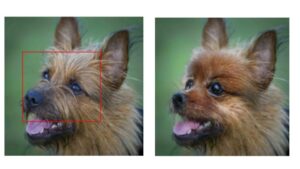
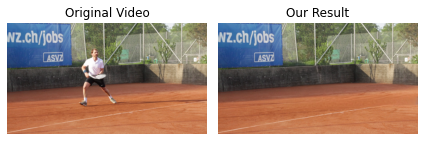
HTML(anim.to_html5_video())左が入力、右が出力となります。
画像修復技術により、テニスプレイヤーを消すことができました。
画像だけでなく、動画でも同様に処理ができます。
なお、以下のように1行のコードでも簡単に実行できます。
(出力結果は同じですので省略します)
!python test.py --video examples/tennis --mask examples/tennis_mask --ckpt E2FGVI-CVPR22.pth任意の動画で画像修復をするためのデータセット作成
ここからは任意の動画で画像修復をするため、セグメンテーションによるマスク画像の作成方法を紹介します。
詳細は以下の記事で紹介しておりますので、合わせてご確認下さい。
【物体検出】2万種類の物体検出ができるDeticを使って物体検出結果のCSV出力とマスク画像作成をする
Meta(旧 Facebook)が2022年1月に発表した新しい物体検出器であるDetic(Detecting Twenty-thousand Classes using Image-level Supervision) […]

導入
以下の通り導入していきましょう。
import torch
TORCH_VERSION = ".".join(torch.__version__.split(".")[:2])
CUDA_VERSION = torch.__version__.split("+")[-1]
print("torch: ", TORCH_VERSION, "; cuda: ", CUDA_VERSION)

!pip install detectron2 -f https://dl.fbaipublicfiles.com/detectron2/wheels/$CUDA_VERSION/torch$TORCH_VERSION/index.html
!git clone https://github.com/facebookresearch/Detic.git --recurse-submodules
%cd Detic
!pip install -r requirements.txtimport detectron2
from detectron2.utils.logger import setup_logger
setup_logger()
import sys
import numpy as np
import pandas as pd
import os, json, cv2, random
from google.colab.patches import cv2_imshow
from detectron2 import model_zoo
from detectron2.engine import DefaultPredictor
from detectron2.config import get_cfg
from detectron2.utils.visualizer import Visualizer
from detectron2.data import MetadataCatalog, DatasetCatalog
sys.path.insert(0, 'third_party/CenterNet2/projects/CenterNet2/')
from centernet.config import add_centernet_config
from detic.config import add_detic_config
from detic.modeling.utils import reset_cls_testcfg = get_cfg()
add_centernet_config(cfg)
add_detic_config(cfg)
cfg.merge_from_file("configs/Detic_LCOCOI21k_CLIP_SwinB_896b32_4x_ft4x_max-size.yaml")
cfg.MODEL.WEIGHTS = 'https://dl.fbaipublicfiles.com/detic/Detic_LCOCOI21k_CLIP_SwinB_896b32_4x_ft4x_max-size.pth'
cfg.MODEL.ROI_HEADS.SCORE_THRESH_TEST = 0.5
cfg.MODEL.ROI_BOX_HEAD.ZEROSHOT_WEIGHT_PATH = 'rand'
cfg.MODEL.ROI_HEADS.ONE_CLASS_PER_PROPOSAL = True
predictor = DefaultPredictor(cfg)BUILDIN_CLASSIFIER = {
'lvis': 'datasets/metadata/lvis_v1_clip_a+cname.npy',
'objects365': 'datasets/metadata/o365_clip_a+cnamefix.npy',
'openimages': 'datasets/metadata/oid_clip_a+cname.npy',
'coco': 'datasets/metadata/coco_clip_a+cname.npy',
}
BUILDIN_METADATA_PATH = {
'lvis': 'lvis_v1_val',
'objects365': 'objects365_v2_val',
'openimages': 'oid_val_expanded',
'coco': 'coco_2017_val',
}
vocabulary = 'lvis' # change to 'lvis', 'objects365', 'openimages', or 'coco'
metadata = MetadataCatalog.get(BUILDIN_METADATA_PATH[vocabulary])
classifier = BUILDIN_CLASSIFIER[vocabulary]
num_classes = len(metadata.thing_classes)
reset_cls_test(predictor.model, classifier, num_classes)動画からセグメンテーション
動画からセグメンテーションを実行します。
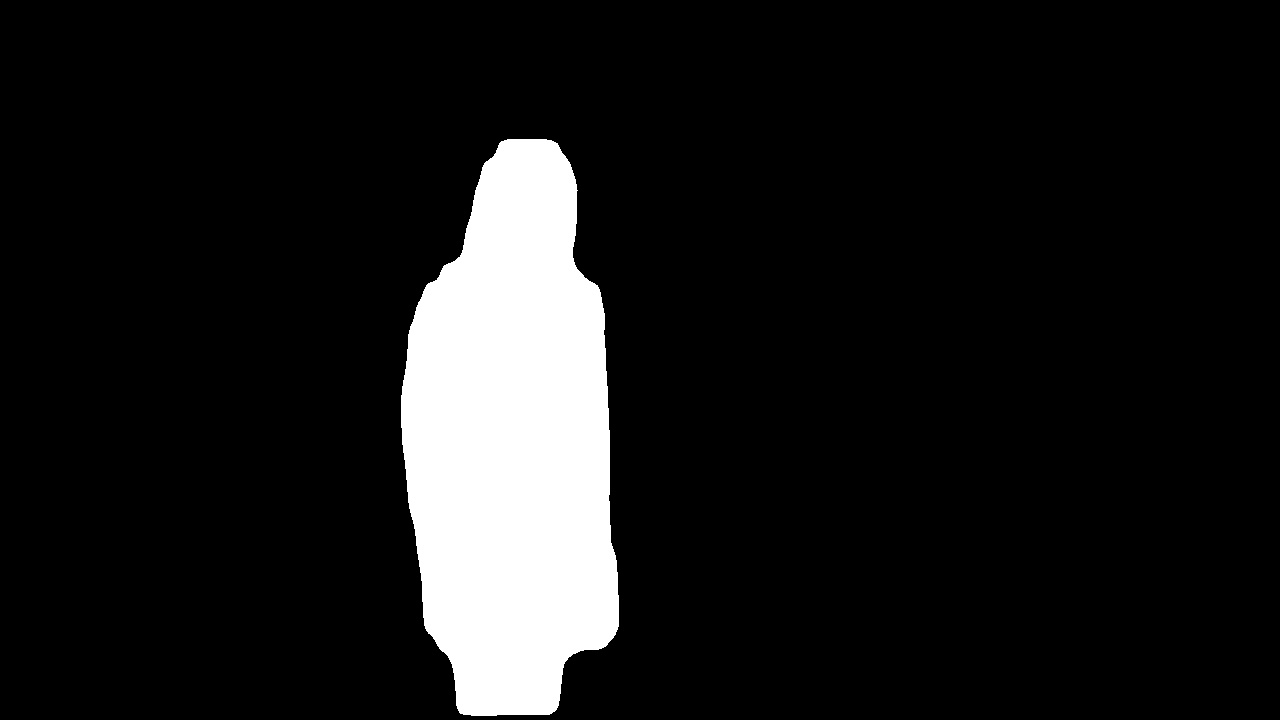
フレームごとにセグメンテーションを行い、画像として保存します。
あらかじめ出力先のフォルダ(「man」と「man_mask」)を作成しておきましょう。
def movie_mosaic(input_video):
video = cv2.VideoCapture(input_video)
w = int(video.get(cv2.CAP_PROP_FRAME_WIDTH))
h = int(video.get(cv2.CAP_PROP_FRAME_HEIGHT))
frame_count = video.get(cv2.CAP_PROP_FRAME_COUNT)
num = 0
while(video.isOpened()):
ret,frame = video.read()
if ret == True:
cv2.imwrite('./man/' + str('%04d' %num) +'.jpg',frame)
outputs = predictor(frame)
target = MetadataCatalog.get(cfg.DATASETS.TRAIN[0]).thing_classes.index("person")
classes = np.asarray(outputs["instances"].to("cpu").pred_classes)
masks = np.asarray(outputs["instances"].to("cpu").pred_masks)[classes==target].astype("uint8")
contours = [ cv2.findContours(m, cv2.RETR_EXTERNAL, cv2.CHAIN_APPROX_SIMPLE)[0] for m in masks]
con =np.asarray(contours)[0]
for i in range(1,len(masks)):
con =con+np.asarray(contours)[i]
im_con = frame.copy()
draw_campus = np.zeros_like(im_con, dtype=np.uint8)
cv2.fillPoly(draw_campus, con, color=(255,255,255))
from PIL import Image
Image.fromarray(draw_campus)
cv2.imwrite('./man_mask/' + str('%04d' %num) +'.jpg',draw_campus)
print(num,frame_count,len(masks))
num += 1
else:
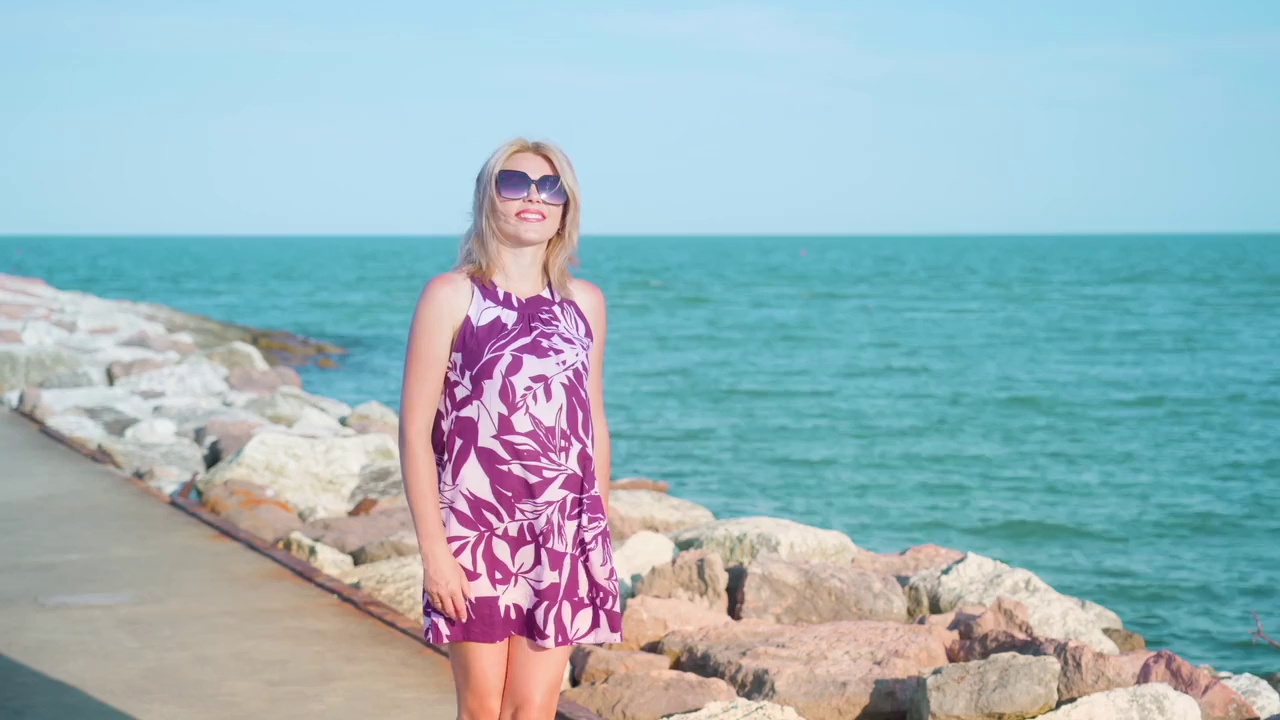
break最後に動画名を指定して、実行しましょう。
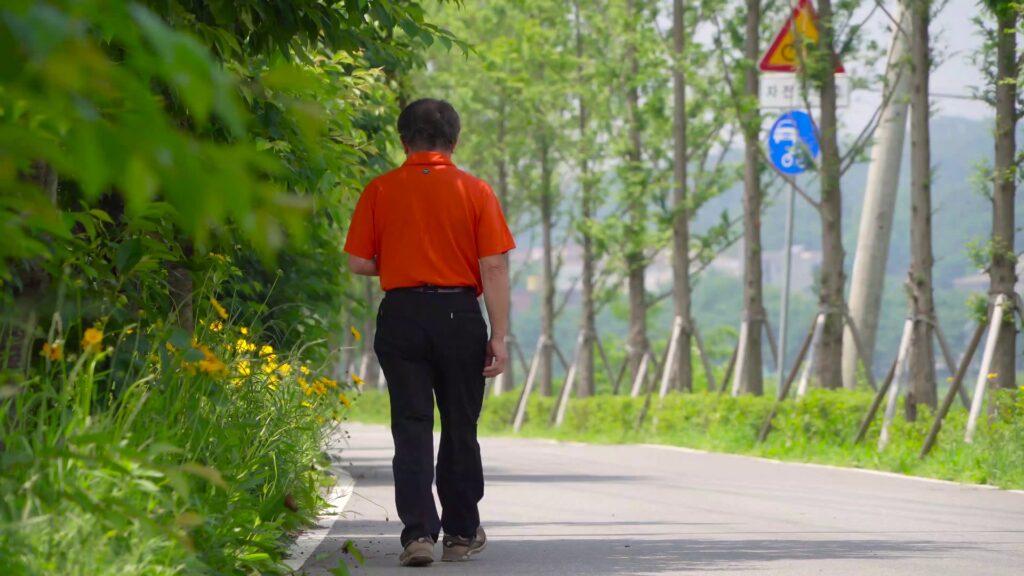
ここでは「Man.mp4」という動画を使用します。
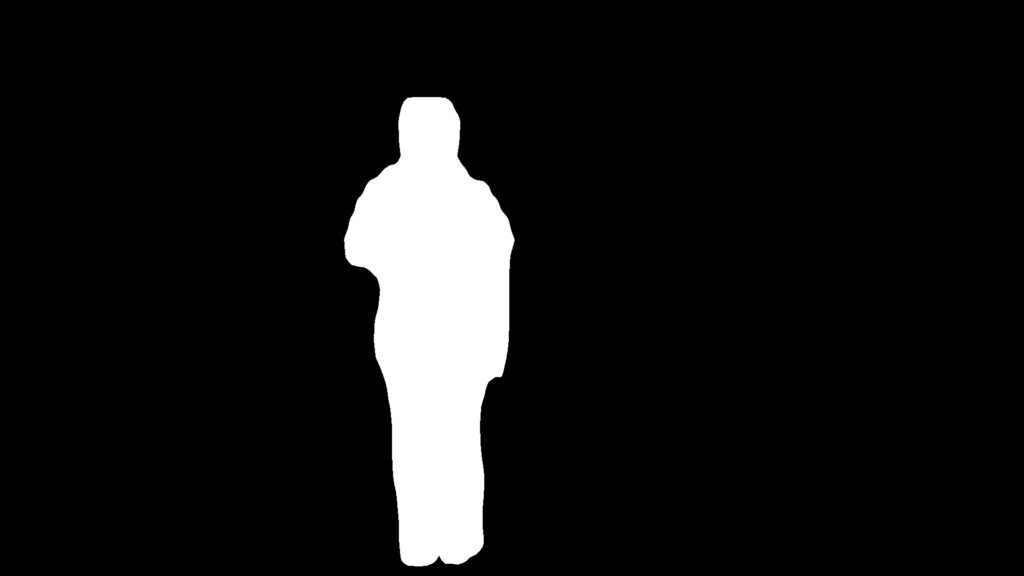
movie_mosaic('Man.mp4')フォルダにフレームごとに元画像とマスク画像が出力されました。
オリジナルデータでE2FGVIを実装
先ほどの章で作成したデータセットを配置して、以下のコマンドを実行しましょう。
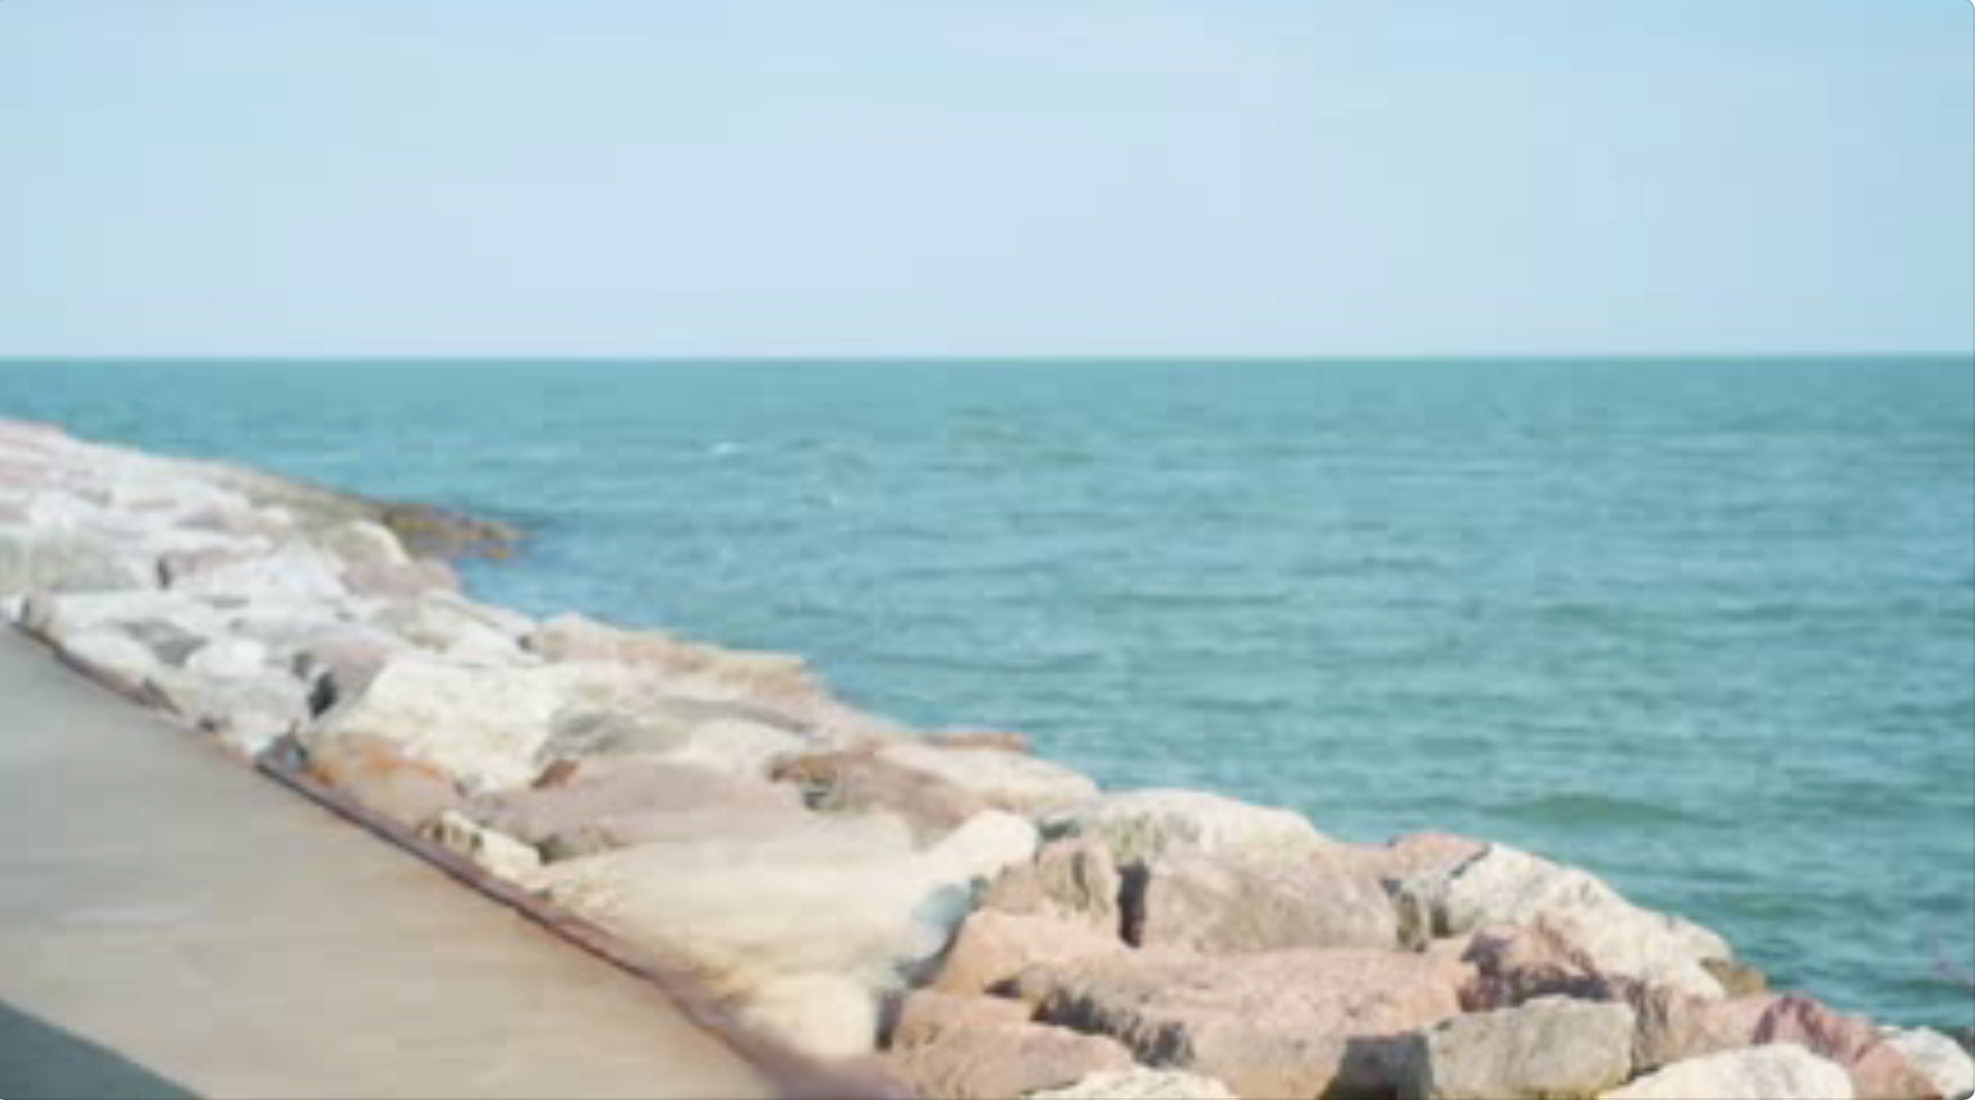
!python test.py --video examples/man --mask examples/man_mask --ckpt E2FGVI-CVPR22.pthサンプルデータの際と同様に人物を消すことができました。
結果を動画にしましたので、ぜひご覧ください。
まとめ
最後までご覧いただきありがとうございました。
今回は動画修復(Video Inpating)をEnd to Endに実現するフレームワークであるE2FGVIを紹介しました。
様々なタスクに活用できそうですね。